
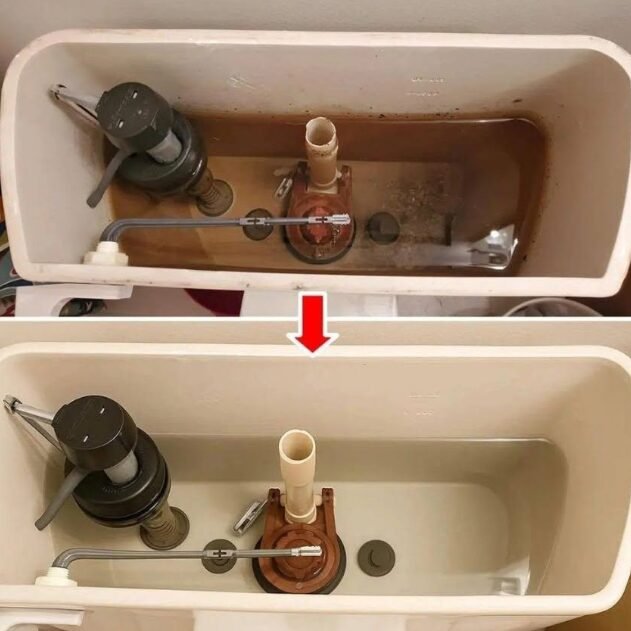
How to clean your toilet flush and make it look like new is a simple home maintenance project that can completely transform your bathroom’s hygiene and performance. Over time, mineral deposits, rust, algae, and grime build up inside the toilet tank, causing foul odors and sluggish flushing action. Restoring your toilet tank back to pristine condition requires basic household items and a methodical cleaning process. 🚽
Materials & Tools Needed
- 2 to 3 cups of Distilled White Vinegar (or Citric Acid power)
- 1/2 cup Liquid Dish Soap
- 1 Scrub Brush with long handle (or an old stiff-bristle toothbrush)
- 1 Non-scratch Sponge
- 1 Pair of Rubber Gloves
- Clean microfiber towels
Step-by-Step Restoration Process
- Turn Off Water and Drain the Tank: Locate the shut-off valve behind your toilet and turn it clockwise until fully closed. Flush the toilet repeatedly while holding the lever down to drain almost all water out of the tank.
- Apply the Cleaning Solution: Pour 2 to 3 cups of distilled white vinegar directly into the bottom of the tank, along with a few squirts of liquid dish soap. Let the solution sit for at least 30 to 45 minutes to dissolve stubborn mineral scale and rust stains. 🧽
- Scrub the Tank Walls and Components: Put on rubber gloves and use a stiff-bristle scrub brush to scrub the porcelain walls, floor, and corner crevices. Gently scrub around fragile internal hardware like the flapper, fill valve, and float ball using a small brush.
- Refill and Flush the System: Turn the water shut-off valve back on counter-clockwise to allow the tank to refill with fresh water. Flush two to three times to rinse away all loosened debris, dissolved grime, and residual cleaning agents.
- Wipe Down Exterior Handles and Levers: Polish the flush handle and top rim using a microfiber cloth lightly dampened with soapy water to finish off the complete overhaul. ✨
